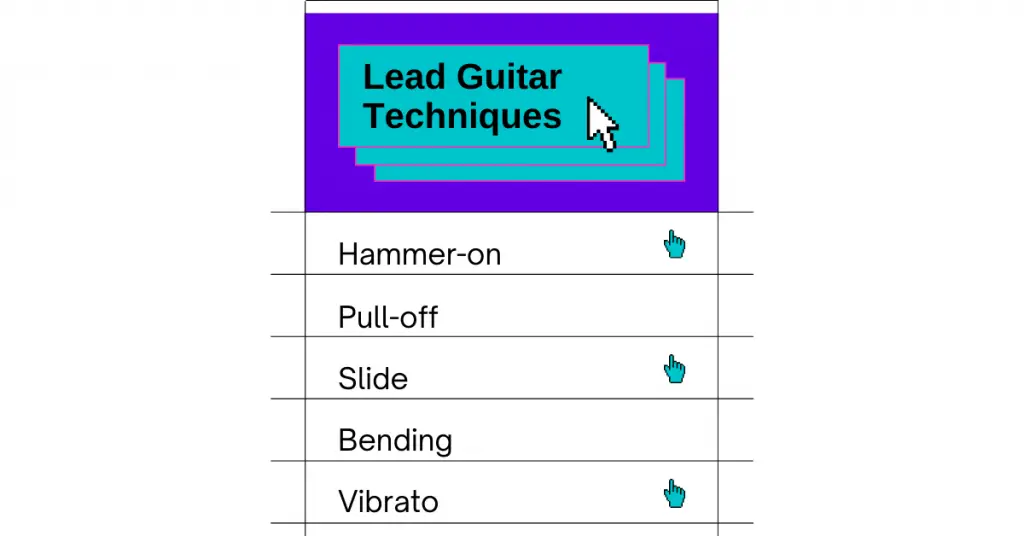
Table of Contents
Today you’ll learn 11 essential lead guitar techniques that will help you sound like a pro guitarist!
Let’s dive right into it!
Quick Note About Lead Guitar Techniques
Okay, to make life easy for you, all of the examples are going to be in the A Minor Pentatonic Scale.
Check out this post if you want to learn more about the pentatonic scale.
And something to always remember with lead guitar techniques is that all of these techniques are meant to assist you with your phrasing!
Lead Guitar Techniques Examples PDF
You can click on the PDF to view or download the examples.
IMPORTANT Note on examples
Each lead guitar technique below has an accompanying example.
The examples are shown in the downloadable PDF above.
The easiest way to view the examples is by printing the lead guitar techniques PDF, or viewing it in a different tab.
1. Hammer On
A hammer-on is where you pick a note, and then without picking we will use our fretting hand to apply pressure to our next note.
You want to practice hammer-ons on all six individual strings because hammer-ons feel different on each string.
You’ll also want to practice hammer-ons with each finger on the fretting hand.
Example:
In the example you will hammer on to the 8th fret of the high E string with your pinky finger.
2. Pull-Off
A pull-off is essentially the opposite of a hammer-on.
When you’re doing a pull-off you’ll pull-off to whatever finger is towards the headstock of the guitar.
In this case, we have our pinky going to the index finger, and we use our pinky to essentially pluck that string with our fretting hand.
So, we pick the note with our picking hand, then you pull down on the high E with your pinky whilst continuing to hold the 5th fret high E, and that keeps our string grounded.
Example:
In the example you’ll pull off from 8-5 on the high e string, moving from pinky to index.
3. Slide
Now lets’s talk about one of my favorite techniques, the slide!
So rather than hammering on to the eighth fret from the fifth fret, you could instead slide from the fifth to the eighth fret instead.
You’ll get a different sound by doing this, and it’s going to be a lot more common in a genre like blues guitar or even jazz guitar.
How do you slide?
The way you slide is you just pick your note and you keep holding that string and then you slide your finger up to the next note you want to play
Example:
Perform the slide as shown in the PDF.
4. Bending
Alright! This next technique is bending.
When you’re bending a note you’re trying to bend it to a certain pitch or another note.
When practicing your bends, pick your first note, then pick the note you want to bend to, then bend to that note. This way you will hear the note you are attempting to bend to.
When bending you’ll want to use fingers behind your bending finger to reinforce it. For example, bend with your ring finger and use your middle and index fingers to give your ring finger some strength.
Example:
The note you’re going to bend is the eighth fret of your b string which is a G note, and you’ll to bend it up to an A note (10th fret).
5. Unison Bends
With bending you also have unison bends, where you’ll do a basic bend on one string, but at the same time use your index finger on the below string to play the note that you’re bending to.
As you bend the note on the string above, you’ll already be playing the note that you’re trying to bend to.
Here’s an in-depth lesson on Unison Bends from Music Radar.
Example:
Looking at the example, use your index finger on the fifth fret high E, and your ring finger on the B string eighth fret, then pick those notes together, and you’ll get a unison bend.
6. Vibrato
If you want to make your notes have some character, you need to learn vibrato.
Vibrato is just bending your note in and out of pitch, but you’re usually doing it at an even frequency.
You don’t want your bends in and out of pitch to be sporadic. You want to move to the same note every time.
Vibrato Example:
Look at the guitar tab symbol in the example, then practice bending that note in and out of pitch, and you’ll get vibrato.
7. Pinch Harmonics
Your next technique to spice up a note is a pinch harmonic!
When you’re doing a pinch harmonic it’s actually really simple. You’ll use the flesh of the thumb and put it against the string as you pick.
When you’re first learning pinch harmonics you’ll want to practice them everywhere on the guitar body.
Pinch Harmonics Example:
Look at the musical symbol shown in the example, and try playing a pinch harmonic on multiple strings. I’d suggest starting on the G and D strings. Those were easiest for me starting out.
8. Octaves
One of the coolest lead guitar techniques is moving in octaves.
Octaves Example
For example, we can take five and eight of the low E string (our A and C notes), and we can move up to the A and C note in the next octave.
So that’d be 5 and 8 of low E, then 7 and 10 of D, then 10 and 13 of B (As shown in the example).
9. Alternate Picking
Our last three lead guitar techniques kind of have to do with the execution of our lead guitar phrases, and these techniques are alternate picking, sweep picking, and tapping.
Alternate picking is where we’re alternating between going down and up with the picking hand.
It’s that simple, but you need to practice alternate picking a lot to get it down
Example:
I honestly suggest practicing alternate picking with a two-note per string scale, such as A Minor Pentatonic. Descend the scale using alternate picking.
10. Sweep Picking
Sweeping is the easiest motion to move from one string to the next string, but usually refers to doing this with 1 note on each string.
Basically, if you play a note with a downstroke or upstroke, and you have to move to an adjacent string, you’d move to that next string with whatever stroke you ended with. This way you are following the economy of motion with your picking hand.
But remember, this only works with an odd number of notes on each string.
Here’s my in-depth article on how to sweep.
Learn to sweep pick in 5 minutes with this video:
Example:
Use the example as shown in the tablature, and move the picking hand like this: Down, Down, Down, Up, Pull-off, Up; then repeat. This creates a total of six motions. Practice them relentlessly.
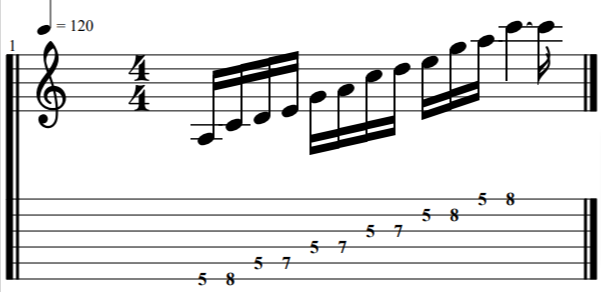
11. Tapping
While I don’t use tapping often myself, guitar tapping can be a great technique for executing licks, riffs, and arpeggios that may not be easily accessible with the fretting hand alone.
Example:
Look at the tapping example, and use the middle finger on your picking hand to tap the 12th fret of High E.
Tapping Basics for Beginners
Here’s an in-depth article on tapping basics for beginners.
Lead Guitar Techniques for Beginners Conclusion
Learn some songs that incorporate these lead guitar techniques.
Start to incorporate these techniques into your playing from there!
Let me know which guitar technique is your favorite in the comments below.
Posts related to lead guitar techniques
Top 5 Right Hand Technique Fundamentals
What are Guitar Picking Techniques? Picking Technique Explained
Shred Guitar Exercises (Daily Practice Techniques)
5 Best Economy Picking Exercises with TAB